Showing posts with label baking. Show all posts

Monday, May 7, 2012

Strawberries And Cream "Anime" cake.

Summers in Madras lie in the spectrum that ranges between Harsh and Brutal. Right now, I'd say that the pointer was teetering at the Cruel gradation. In cooking terms, an evening out on Purasaiwalkam High Road is the equivalent of getting confited in your fat. Gross, but not entirely untrue.

Your hoarded chocolate melt into puddles that stubbornly cling to the foil; please do not suggest refrigeration, I'd never do that to chocolate. Nutella bottles lie untouched. Yogurt and watermelon and Air-Conditioning seem (and are) heaven-sent. It's a little unnatural.

So when I had to make a cake for the brother to be, I didn't even consider the Caramel Peanut Brownie Cake I made him last year. Not only do I frown on repetition, but the heat wouldn't permit more than a forkful. Unless you shovel heaps of Vanilla Bean Ice Cream into the salty caramel. Mmm. There's an idea.

Designing the cake around a person's favourite memory, malt-drink and tastes is the best part about making a birthday cake, in itself. BTB wrote a couple of poetic verses on White Forest Cake, and I knew my options.

Harassed the fruit vendor for two boxes of his best strawberries (last of the season! Depressing.) at 10 percent off.


Bought a couple of vanilla beans from Spice Route (at Express Avenue). They cost up to 150 bucks, but you can stash the deseeded beans in a canister of sugar and Reuse/Recycle.


Strawberries and Cream cake, Strawberry Cake with Cheesecake Frosting, Strawberry Shortcake (Misnomer alert!). Call it any thing you want and get away with it.

You get away with a lot of things when you layer stunningly-vanilla scented sponge cake with a coulis of ripe, red strawberries and the lightest, fluffiest whipped cream. You can even drizzle a little while chocolate ganache over the strawberries, to fancypants it up a little bit. Even if you have an intense revulsion (Mum would knock me on the head if I used that word for food) dislike for "white chocolate". You do it, because your nerdface Brother-to-be likes it.

I'm ready for that Best Sister award any time soon. And I can be paid in Nutella. Once this heatwave/kathiri goes from scorching to muggy.


The sponge cake is your classic sponge: the type with no butter in it, the fluffiness achieved by whipping the egg whites into a frenzy. I folded in 1/3 cup of melted butter towards the end, because I panic in a world where there's no fat in a birthday cake.

The frosting can be made without cream cheese. Whipping cream with sugar is an excellent substitute. However, I wanted a stiff, Japanese-style frosting (the ones stabilised with gelatin) without mucking around with melted gelatin. Read the ingredients list completely before you start shopping... the same things will pop up annoyingly!


Strawberries and Cream "Anime" Cake:

(Sponge cake recipe adapted from Williams Sonoma Magazine)

For the Sponge Cake:

1 ¼ Cups All-Purpose Flour (maida)
2 ½ tsp Baking Powder
1/8 tsp Salt
5 Large Eggs, separated
1 ¼ Cups White Granulated Sugar
5 Tbsp Boiling Water
1 ½ tsp Vanilla Extract
Pods from 1/2 a vanilla bean (optional)
Grated zest of 2 Lemons
1/3 cup melted butter (optional)

For the coulis:

2 cups strawberries, hulled and halved
2 tsps lemon juice/balsamic vinegar/rosewater
5-6 tbsps white granulated sugar

For the frosting:

1 ½ cups fresh cream (whipping cream)
60 grams cream cheese, softened.
1/2 cup powdered sugar, more as required.
1 tsp vanilla essence or pods from 1/2 a vanilla bean

For the ganache:

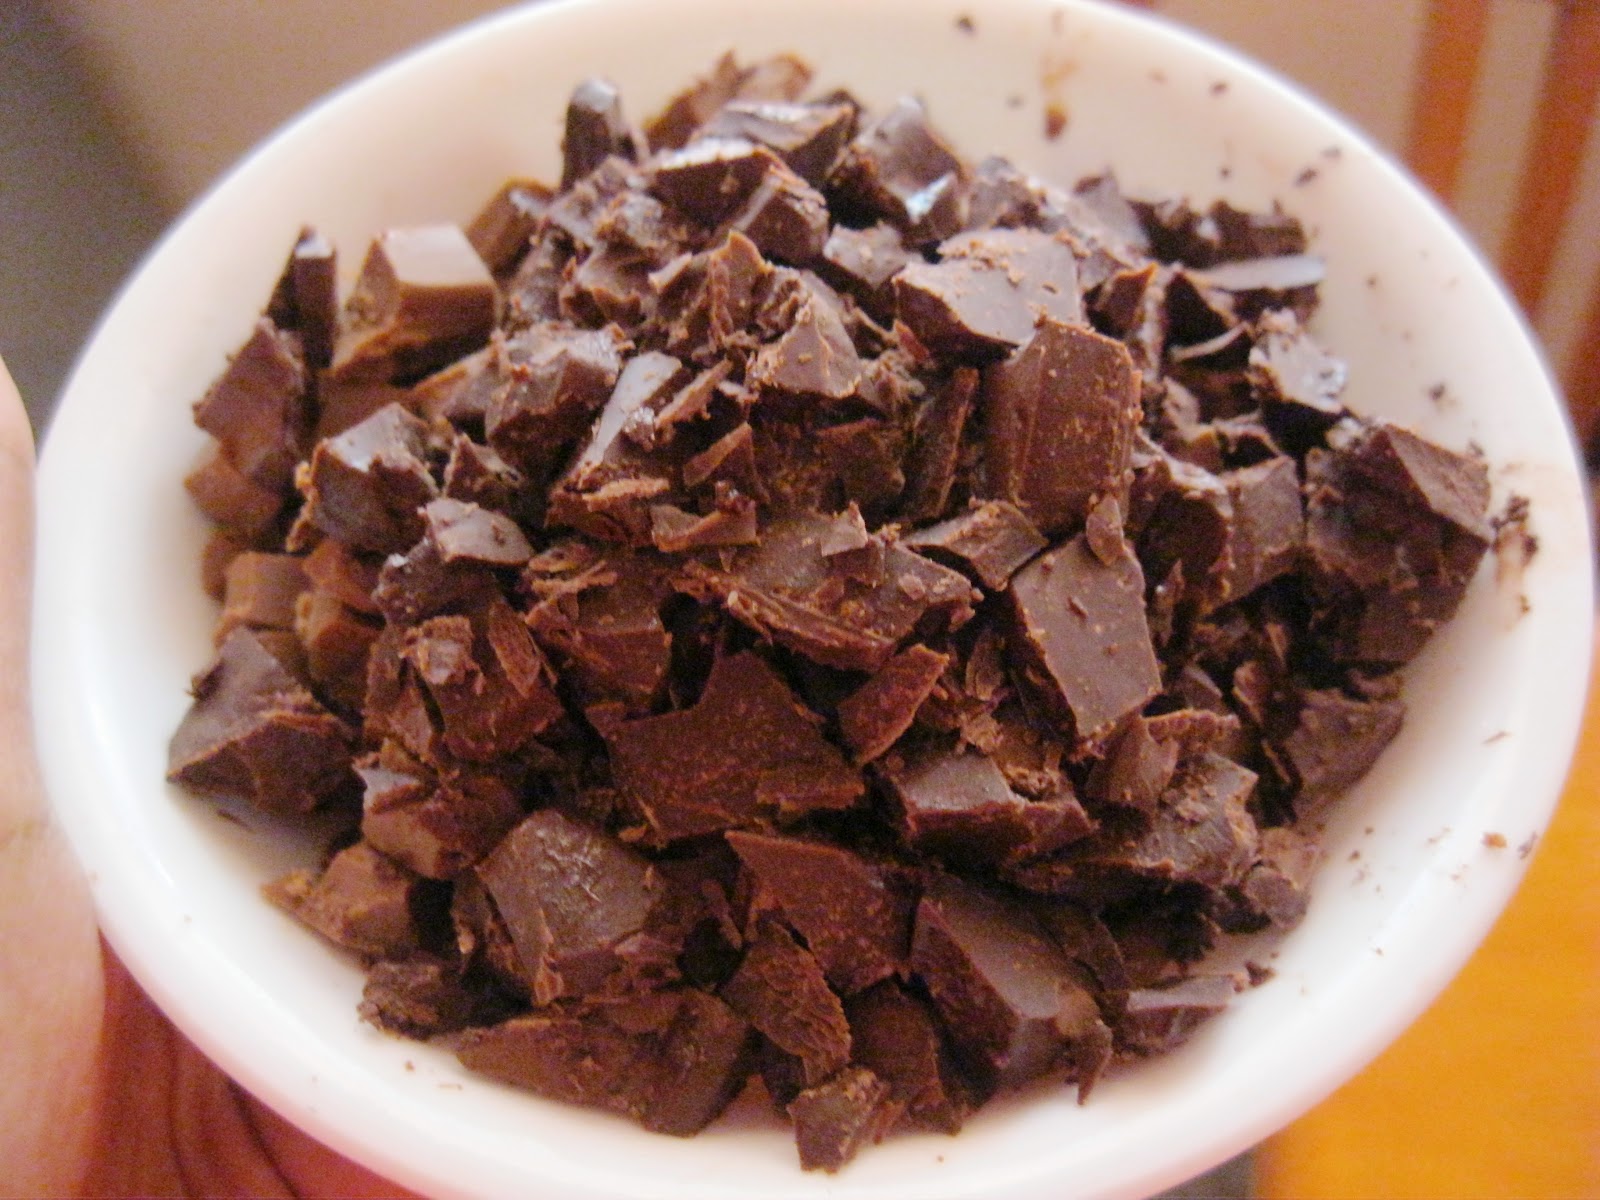
1/3 cup white chocolate, chopped
2 tbsps fresh cream

10 extra strawberries, for decorating.

Method:

For the Sponge Cake:

Preheat the oven to 350 F/180 C. Grease and flour a 9" round pan.

In a bowl, sift together the flour, baking powder and salt. Keep aside.

In another big bowl, whip together the egg yolks and sugar on Medium Speed until thick yellow ribbons form when you lift the beater. The mixture will be grainy.

Pour in the boiling water. Turn off the mixer and scrape down the sides and bottom of the bowl. Increase the speed to high and whip again until thick. Stir in the vanilla extract/pods and lemon zest. Fold in the flour mixture until just combined.

In a separate, CLEAN, DRY BOWL, whip together the egg whites on Medium-High, with CLEAN, DRY beaters. Whip until thick, but not entirely dry.

Fold in half the egg whites into the batter, then the other. Do NOT overfold. You can now stir in 1/3 cup of melted butter, if using.

Gently spread the batter in the prepared pan. Bake until a wooden skewer inserted into the center of the cake comes out clean, about 30 minutes. Let the cake cool in the pan for 10 minutes.

Turn it out onto a wire rack, and let it cool for a couple of hours (throw in the freezer for 20 minutes if pressed for time). Take it out and cut into two layers, horizontally, using a serrated knife or thread. You can attempt more layers, but I didn't want to risk it.

For the coulis.

Marinate the strawberries in the lemon juice and sugar for around one hour. Blitz half the strawberries in a mixie/food processor. Heat the pureed strawberries and juice over low heat for 5 minutes until you get a nice syrup.

Reserve the remaining marinated strawberries.

For the cream:

Beat the whipping cream until soft peaks form. Make sure the cream is cold when you beat it. Keep aside.

Beat the cream cheese (at room temperature) until it forms soft peaks. Add in the sugar and beat until incorporated. Beat in the whipping cream and vanilla until combined. Taste to see if you require more sugar.
Keep in the refrigerator until use.

For the white chocolate ganache:

Melt together the fresh cream and white chocolate in a microwave safe bowl until smooth. Set aside to cool.


Assembling the cake:

On one layer of the sliced cake, spread the strawberry coulis. The reserved whole macerated strawberries should be arranged along the circumference/perimetre of the cake.

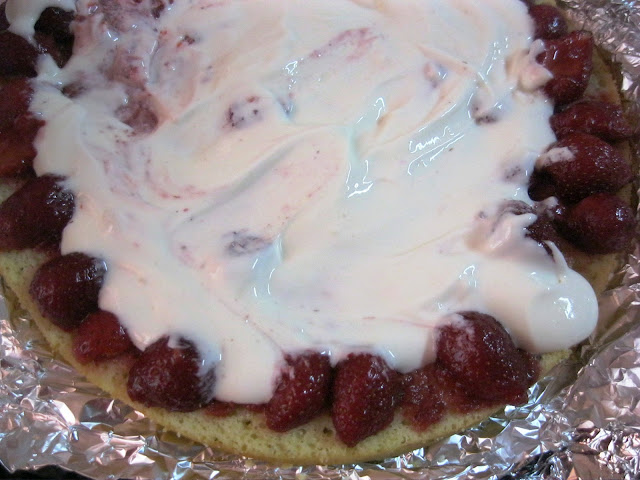
Spoon over half the whipped frosting on the cake.


Make sure some of it overflows, so it looks appetizing from the outside.


Close with the other layer of cake. Spoon over the remaining frosting. Decorate with the ten strawberry halves.


You can do some piping with the ganache that you've made, but this is strongly optional.


Refrigerate assembled cake for up to 4 hours. Take the chilled cake and place it out for around 20 minutes before serving, so it's all moist. If you live in a hot/humid/cruel/harsh/brutal place, three minutes should do the job.

Enough cribbing. You now have an Anime Cake, named wistfully after the type of pastry that keeps on coming up on various manga. You can practically hear the "tih-din-tih-din" Animax break-tune. Ultra Maniac is probably on next. School vacations were just about the only tolerable thing about Summer. Apart from Mangoes. Sigh.

Monday, April 30, 2012

Boring Disclaimer. Marbled Chocolate-Banana Bread with Peanut Butter Frosting.

After almost a decade of their existence, I've realised the purpose of blogs. To be foist-fully heard.

No, I'm serious. I can text it, Status Update it and yell it along with the best of them, but I won't be heard as much as if I post it along with pictures of "deelishus!" food.

I'm so thoroughly grateful and happy to have people in my life who offer to send me cookies from across the seas and soup from across the streets. And to the people who make curious/concerned phone calls at the increasingly skyrocketing Bangalore-to-Madras rates. You're all very cool. Very occasionally.

Disclaimers aren't as cool, though. They are pesky, annoying and I almost always check "Agree to all terms and conditions" without reading them. You might want to read this bit.. You can doze off and pretend you have. I almost always do. Here goes.

Kindly take everything I say with a pinch of salt (make it Fleur de Sel, if you can lay your hands on some). I never, ever speak as a medical practitioner in this site. Butter and dark chocolate do not cancel each other out. My 8-year-old sister can tell you that. As a doctor who sees hoards of people with a plethora of lifestyle diseases, whose origins are almost always in the refrigerator, I know I have a responsibility. Which I hope I fulfill within the confines of my Outpatient Department and the people who call me for the purpose of medical advice.

On this blog? I'm your average twenty-four-year-old. I care equally about shockingly-blue skinny jeans and the fibrofatty plaques on  arterial walls. I blissfully lie to myself that Frozen-Yogurt is healthy. I touch the petri-dishes that handle-bars on the local trains are, without the fact even registering in. I regularly extol the virtues of raw cookie dough (the kind with eggs in it).

Sometimes I do not know if I'm typing out on a sordid Blogger text box or performing theatrics at The Globe. That's just me. I'm sorry. It's nearly impossible for me to completely cut the medicine out of it. I might tell you to add in flax seeds or talk about how crucial Calcium is.

But, please, please take caricature-ish verses on Butter with a pinch handful of salt. Call me during working hours, and I'll ask you to stay off both.

Not here. Of course, if it falls under the ambiguous umbrella of Healthy, I'll tag it.

I've spoken enough for my generation and the next. We'll head on to the Recipe of the Day.

Banana Bread. You can never have enough recipes for it.


This loaf has less calories than your average nut-studded, brown-butter-filled loaf. It has chocolate in it, though. Taste (and calorie count) is heightened by the addition of creamy, slightly salty Peanut Butter Frosting. That's all I'm saying.

Latha (tamil-muslim-word for big sister)'s little helper enjoys the cake of our labour!

Marbled Banana Bread:
(recipe source for bread: Post Punk Kitchen)


Ingredients:

1 cup mashed over-ripe banana
1/2 cup white sugar
1/4 cup brown sugar
1 teaspoon vanilla essence
2 tablespoons neutral vegetable oil (canola, sunflower)
1/3 cup milk (make it almond to go Vegan!)
1 1/2 cups all purpose flour
3/4 teaspoon baking soda
3/4 teaspoon salt
3 tablespoons unsweetened cocoa powder
6 tablespoons boiling water, divided

Peanut Butter Frosting:
1/4 cup peanut butter (Creamy/crunchy are both fine)
2 tbsps milk
1 tbsp butter, at room temperature
1/2 cup powdered sugar
1/4 tsp vanilla
a pinch of salt.
Method:

Preheat oven to 350 F.

Mash bananas (3 or so), until you get a cup's worth.

Beat in the sugar, oil, vanilla and milk until you get a smooth mix.

In another bowl, mix together the flour, baking soda and salt until combined. Fold it into your banana-egg mix gently. It's OK if there are tiny streaks of flour. Do NOT overmix.

Measure out one cup's worth of batter in a separate bowl and keep both portions aside.

In a small cup, mix together 3 tbsps cocoa powder and 3 tbsps boiling water until it forms a homogeneous mix. Add this cocoa to the cup's worth of banana bread batter and fold with a fork until it's combined.


To the remaining plain banana bread batter, add 3 tbsps of boiling water and mix with fork until combined.

You now have your batter duo.

 Layer one batter over one corner of the greased loaf tin.
Add the chocolate-filled batter to the other half.

Swirl it around carefully with a blunt bread knife. Over mixing defeats the purpose of a marbled bread!

Bake for around 50 minutes, until a toothpick inserted into the centre comes out clean.


Slice and frost with the Peanut Butter frosting while still warm.
Peanut butter frosting comprises of all the ingredients blitzed together in a blender. Thin out with more milk or sweeten/thicken it with more powdered sugar. It really is that simple!
Enjoy with a cup of tea/coffee.


Or just attack the frosting, then the bittersweet chocolate portion and then the scented banana portion.


Laatha's little helper is always right. When it comes to food.

Tuesday, April 17, 2012

Chocolate Chip Cookie 101, 201, so on and so forth.

If you've ever seen the "About Me" page, you would've read the bit about being "The Girl Who Makes Chocolate Chip Cookies."

After all that build up and a year-and-a-half's worth of frantic food blogging, I realised that there isn't ONE honest-to-God Chocolate Chip Cookie recipe on the blog. Shame on me.

My excuse is that I make these little babies so often that I don't pause to take photos of the process. I've been making the TollHouse cookies since Time Immemorial (actually, 2002). They've almost never gone wrong on me and I don't believe in fixing things if they aren't (can't bring myself to say ain't) broken. Then the food-blog lifestyle happened.

And thus began my search for the Best Chocolate Chip Cookie in the Whole Wide World.

After much experimentation, the thing I've inferred is that term "Best" is purely subjective. I love my cookies to be cakey and chewy, with a high chocolate:cookie dough ratio. I don't do crisp, biscuit-type cookies. I'll scarf down packet after packet of Walkers' shortbread, of course. But if there was a plate of biscotti versus a plate of cookies, I'd be pigging out on the cookies.

As would my trusted merry band of guinea pigs.

"B****, please. Don't be up in my space when I'm watching ToyStory3 for the 1000th time."

P.S.: We eat rice by the sack-and-drum full. However, we do not let our kids swear. I swear.
Nigbe's "B****, please, I'm eating" poker face. The expert judges don't give anything away.


It's an easy recipe... that automatically means it's easy enough to screw up. I'll show you pictorially (and spare you the thousand words), on what you should and shouldn't do.


The butter has to be softened and at room temperature, as per Nestle Tollhouse's original CCC recipe. I heat my butter until it's just about melted; this helps to melt down the dark brown sugar and imparts a robust flavour to the cookies. It's boring to wait around for the butter to soften... even at Madras, where it takes about two minutes.


The recipe originally calls for an egg and a egg yolk. Since our Indian eggs have very little albumin, I dump two full eggs in. I suck at separating whites and yolks, anyway.


Use the darkest demerara sugar you can find. Light brown sugar works, not as good as dark though. Not only does it stay a little granulated, giving your cookies some crunch, it melts into a delicious, chewy caramel goodness. As for the white sugar, use granulated, not powdered!


For cakey cookies, use All-Purpose flour (maida). Alton Brown recommends Bread Flour only, the NY Times recommends a blend of Bread flour and Cake flour, but this is a moot point at Madras. For authentic cookies, use AP flour. You can experiment with wholewheat once you master basic CCCs.


Oooh. The most important part. The chocolate chips. Could you buy a log of disgusting cooking chocolate and chop it into chunks? No.

Could you throw in whatever chocolate you have on hand? The pre-made chocolate chips you find at Nilgris and other supermarkets? HELL, no.

No. No. No. No. And no.


Use only chocolate that you love eating. It doesn't work otherwise. And make sure you chop big fat chunks out of it. Since I found Galaxy Smooth chocolate bars on sale, I bought eight bars of it, ate four, and used the remaining for these cookies. How I wish I were lying.


I've used milk and dark chocolate chips in the ratio of 2:1. It gets too sickeningly sweet, otherwise.


Beat the eggs, sugar and butter as much as you want. After you add in the flour, chocolate chips and other random mix-ins, get a hold of yourself.


Always, always, always add salt. Eat the cookie dough, if you don't feel very strongly about Salmonella. Even if you don't have the time to refrigerate it for 24 to 36 hours, stow it in the fridge for at least half an hour. It is a whole lot less messy and has a deeper flavour that way.


That texture, that grittiness, that colour, that's what you want.

Browned edges, pale-ish centre. That's the cookie cooked. Let it cool for a couple of minutes before you take it off the pan/sheet.


Ooooh. Yes.

Cool completely on a wire rack before you throw it in an air-tight box. Remember, baked cookies keep up to three days. If you freeze the dough in the form of balls, in a Ziploc bag, it lasts for a couple of months. Refrigerating cookie dough is permissible for up to 5 days.

Nothing like a plate full of freshly baked cookies, though. That's Love, that is.


Thick and Chewy Chocolate Chip Cookie recipe:
(Adapted from Baking Illustrated)

Ingredients:

2 cups plus 2 tablespoons all-purpose flour
1/2 teaspoon baking soda
1/4 teaspoon salt
3/4 cup unsalted butter, melted and cooled until warm
1 cup packed dark brown sugar
1/2 cup granulated white sugar
2 eggs, at room temperature
2 teaspoons vanilla essence
1.5 cups milk and dark chocolate chunks.
1/2 cup walnuts, chopped. (optional)

Method:

Preheat the oven to 325 F or 160 C. Line a baking tin with aluminium foil. You don't have to grease it.

In a medium-sized bowl, stir together the flour, baking soda and salt. Mix well and keep aside.

In another bowl, melt the butter and let it turn lukewarm. Add in the sugars and beat for around 2 minutes. Blend in the eggs and vanilla essence until combined.

Now add in the flour mix. It's better to fold in by hand, but if you must use the beater, do it at the lowest speed and STOP when it's moderately combined.

Stir in the nuts (if using) and chocolate chips.

At this point, refrigerate the cookie dough (after eating several spoonfuls raw, of course) for at least half an hour. Using a ice-cream scoop or a soup spoon/ladle type thing, form balls out of the cookie dough.

You can Saran/cling-film wrap the bowl with the dough in it, so that it doesn't absorb any of the refrigerator smells.

Place about 1/4 cup worth of cookie dough on the sheet. Space the cookies, as they tend to spread and bake.

Bake for 15 minutes and check if the edges are mildly brown and hard. The centres have to be puffy, soft and tan. Rotate the sheet once during the baking process so that all of the cookies get equal heat.

Take it out and cool it on the sheet for 2 minutes. Let it completely cool on the wire rack.

Enjoy!

Variation:

This is fun variation I found at Kevin and Amanda's site when I had a hankering for Red Lobster's Chocolate Chip Cookie Lava Cake.

It's supremely simple.

You can do this in a muffin tin or biscuit tin. Press down about quarter cup of cookie dough. Add a square or two of chocolate.


Stuff back with more cookie dough.

Bake away until the edges are golden brown! After a minute or two, turn out the cookie/cake monstrosity (in a GREAT way).

Serve with vanilla ice cream and fudgy sauce of your choice.


This is Lust. This is.

Tuesday, March 27, 2012

Thai Chicken Pizza.

It seems like any dinner-type recipe I post is of the pasta/pizza variety.

Not necessarily a bad thing, but since I've found my go-to recipe for tomato sauce and pesto, I'm looking beyond classic Italian flavours to incorporate into my pasta/pizza. Variety being the spice of Life and all.

Think Taco-style Mac-and-Cheese, Thai Chicken Pizza, Nutella Pizza and their tasty kind.

Making pizza dough seems like a daunting, Herculean task as a newbie but I humbly ask you to try it. Homemade pizza crust CANNOT be beat, not even by the likes of French Loaf. With some yeast and flour, you'll create something that belongs in the hallowed wood-fired ovens of gourmet pizzerias.

You can get Dry Yeast at any semi-decent supermarket. When you do, check the previous chatty post I've done on the perfect pizza crust. One recipe makes four LARGE thin crust pizzas, so I make pizzas out of half the dough and freeze the other bit for a rainy (really, any) day.

 Thai food was an obsession of sort with me four to five years back. This petered out due to frequent unavailability of kaffir lime/lemon grass/curry pastes... and the prohibitive prices of Benjarong/Lotus/HipAsia. I still love my Satays with peanut sauce, phad thai and this amazing Tom Yum soup that Masterchef Machi makes.

However, my parents took us to Bangkok at an age when we were too young to appreciate local food/culture (wasn't precocious like Today's ten-year-olds). At Pattaya, I was allowed precious little. No Parasailing for Rabia! I could draw on the sands, roasting away in thick jeans (no butterfly applique on my jeans! Mum shopped at the same Ruff'N'Tuff counter for the brother and I... girls' wear largely consisted of butt-ugly frothy frocks back in the nineties).

As for the food, I could slurp down oysters, wasn't-that-fun?! There was also the added pressure of not looking at the other beach-revellers strip down to their bikinis and sip on their Heinekins (my mum warned us that our eyes would rot like oozing spoilt grapes if we looked at Alcohol or scantily dressed women. I believed her for the longest time).

So I survived the trip on Kinder Eggs (nothing like the piece of plastic crap that's sold for 30 bucks at India), prawn crackers and coconut cake.

The coconut cake and the floating markets of Bangkok are what I still vividly remember. Both were insane and incredible. A dense-moist-yet-spongy cake sold by a lovely Thai lady on the Bangkok version of a "platform" (Challenge to self: replicate cake or better yet, go back and try it again before I hit *gasp* thirty).

The floating markets were loud, bustling, chaotic and beautiful rolled into one.

Which brings me to the Dish of the Day (That meant something else before the blog was born!)


Thai Chicken Pizza. A copycat version of California Pizza Kitchen's Thai pizza with a little help from Ms Rachel Ray. A mish-mash of flavours and textures, all loud-bustling-chaotic and most importantly, beautiful.

(Note: You can use any Asian Sweet Chilli sauce, including Maggi's Hot'N'Sweet sauce, but if you can't track some down, make your own. Have added the recipe for a not terribly authentic, but a easy and tasty Sweet Chili sauce!)

Thai Chicken Pizza:
(Makes two large pizzas)

1 batch pizza dough
or 6-8 small premade pizza bases

For the chicken:

For the marinade:

1 tablespoon vegetable oil
2 tablespoons soy sauce
1 rounded tablespoonful peanut butter
2 teaspoons red chilli sauce
2 teaspoons grill seasoning (which has salt)
300 grams boneless chicken, cut into 2" cubes 

For the sweet chilli sauce

1/4 cup tomato ketchup
2 tbsps honey or brown sugar
2 tbsp vinegar
2 tbsp red chilli sauce
2 tbsp water
1 or 2 dried bird's-eye chilli, whole

Toppings

1/2 red bell pepper, thinly sliced
1/2 orange or yellow bell pepper, thinly sliced
a bunch of coriander/cilantro leaves, chopped
a few Thai basil leaves, chopped
3/4 cup roasted peanuts, chopped.
1 cup bean sprouts
1/2 cup of scallions/green onion, chopped (can use sliced red onion)
2/3 cup mozzarella cheese, shredded
dried chilli flakes

Method:

Preheat the oven to 250 C or 500 F for not less than 30 minutes. Make sure you preheat the baking tray in which you plan to bake the pizza, as well.

For the chicken:
If you have only crunchy peanut butter, you might have to pick out the big bits and throw them on along with the roasted peanuts at the end.

Marinate the chicken in the all of the ingredients mentioned for about 15 minutes. Grill the chicken until done, and slice it after it's been rested. You can also cook in a saucepan with all of the juices on medium heat. Do not overcook. Break up the chicken as it cooks.


For the sauce:


Use deep dark sugar or honey for a more caramel-ly taste.


Combine all over the ingredients in a saucepan over medium heat.


De-seed the chilli if you don't like very spicy food. Stir, as the sauce thickens, for about 7 minutes. Taste to see if it needs more chilli sauce or sugar, as per your liking. Add more water if you're using very pungent vinegar.

For the pizza:

Roll out the thawed pizza dough on a well-floured surface. Transfer it to a baking sheet/aluminium foil sheet that has been greased with oiled and sprinkled on with cornmeal or semolina/rawa/sooji. This prevents the pizza from sticking.

Kindly excuse my ugly-ass baking sheet. I tell myself that it's the mark of a true baker to have a burnt, overused sheet.

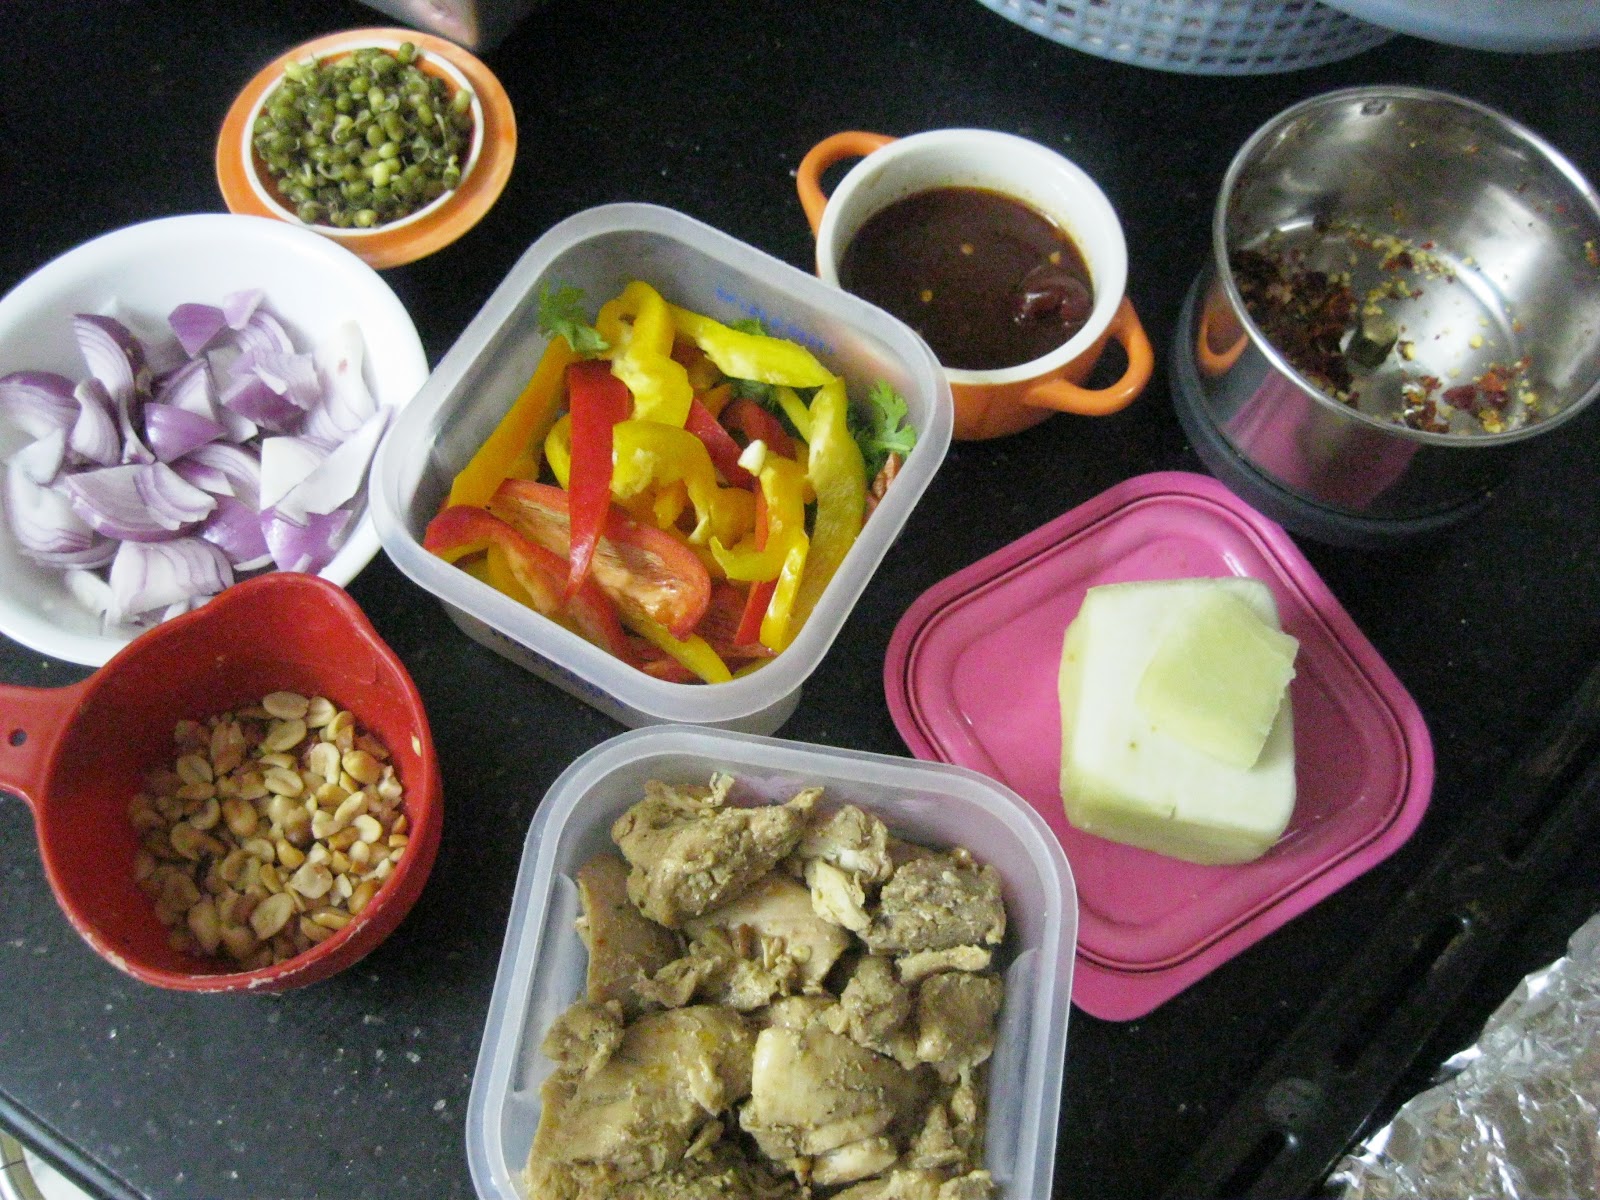
Keep all your toppings in one place so you won't forget to add one or the other.


On top of the rolled out dough, spread some of that sweet chilli sauce. Strew on the onions, peppers, bean sprouts and mozzarella cheese. I tend to not add the chicken, as it dries out and becomes stringy/rubbery in the oven.


Brush the edges with some Olive oil, some extra sauce on top and pop it in.


Bake for 10 minutes, until the edges are golden and the cheese has melted/is bubbly.


Take it out. Strew on cooked, shredded chicken, crushed dried chilli flakes, coriander, basil and peanuts. Add a few random drizzles of the sweet chilli sauce and you're done!


Absolutely delicious, was the unanimous verdict. Each bite was a revelation: you get the cheese, then the hit of the chilli flakes, the nuttiness of the roasted peanuts, the herbiness of the cilantro, the crunch of the onion. Even the pickiest of eaters wolfed it down with no complaint.


My brother did not notice that I had thrown regular sprouts instead of their traditional, infinitely tastier, crunchier white bean sprout counterparts. That, in my book, is a flaunt-worthy success.